

Who can verify content
Organization and project admins and developers can verify or unverify charts and dashboards. Users on other built-in roles (editors, interactive viewers, viewers, members) can see which content is verified, but cannot change verification status themselves. If you use custom roles, grant the Manage content verification (manage:ContentVerification) scope to any role that should be able to verify or unverify content.
Verifying a chart or dashboard
Admins and developers can verify content directly from the chart or dashboard, or from the verification panel in project settings. They also have a dedicated verification panel under Project settings that lists all verified content and provides a central place to manage verification across the project.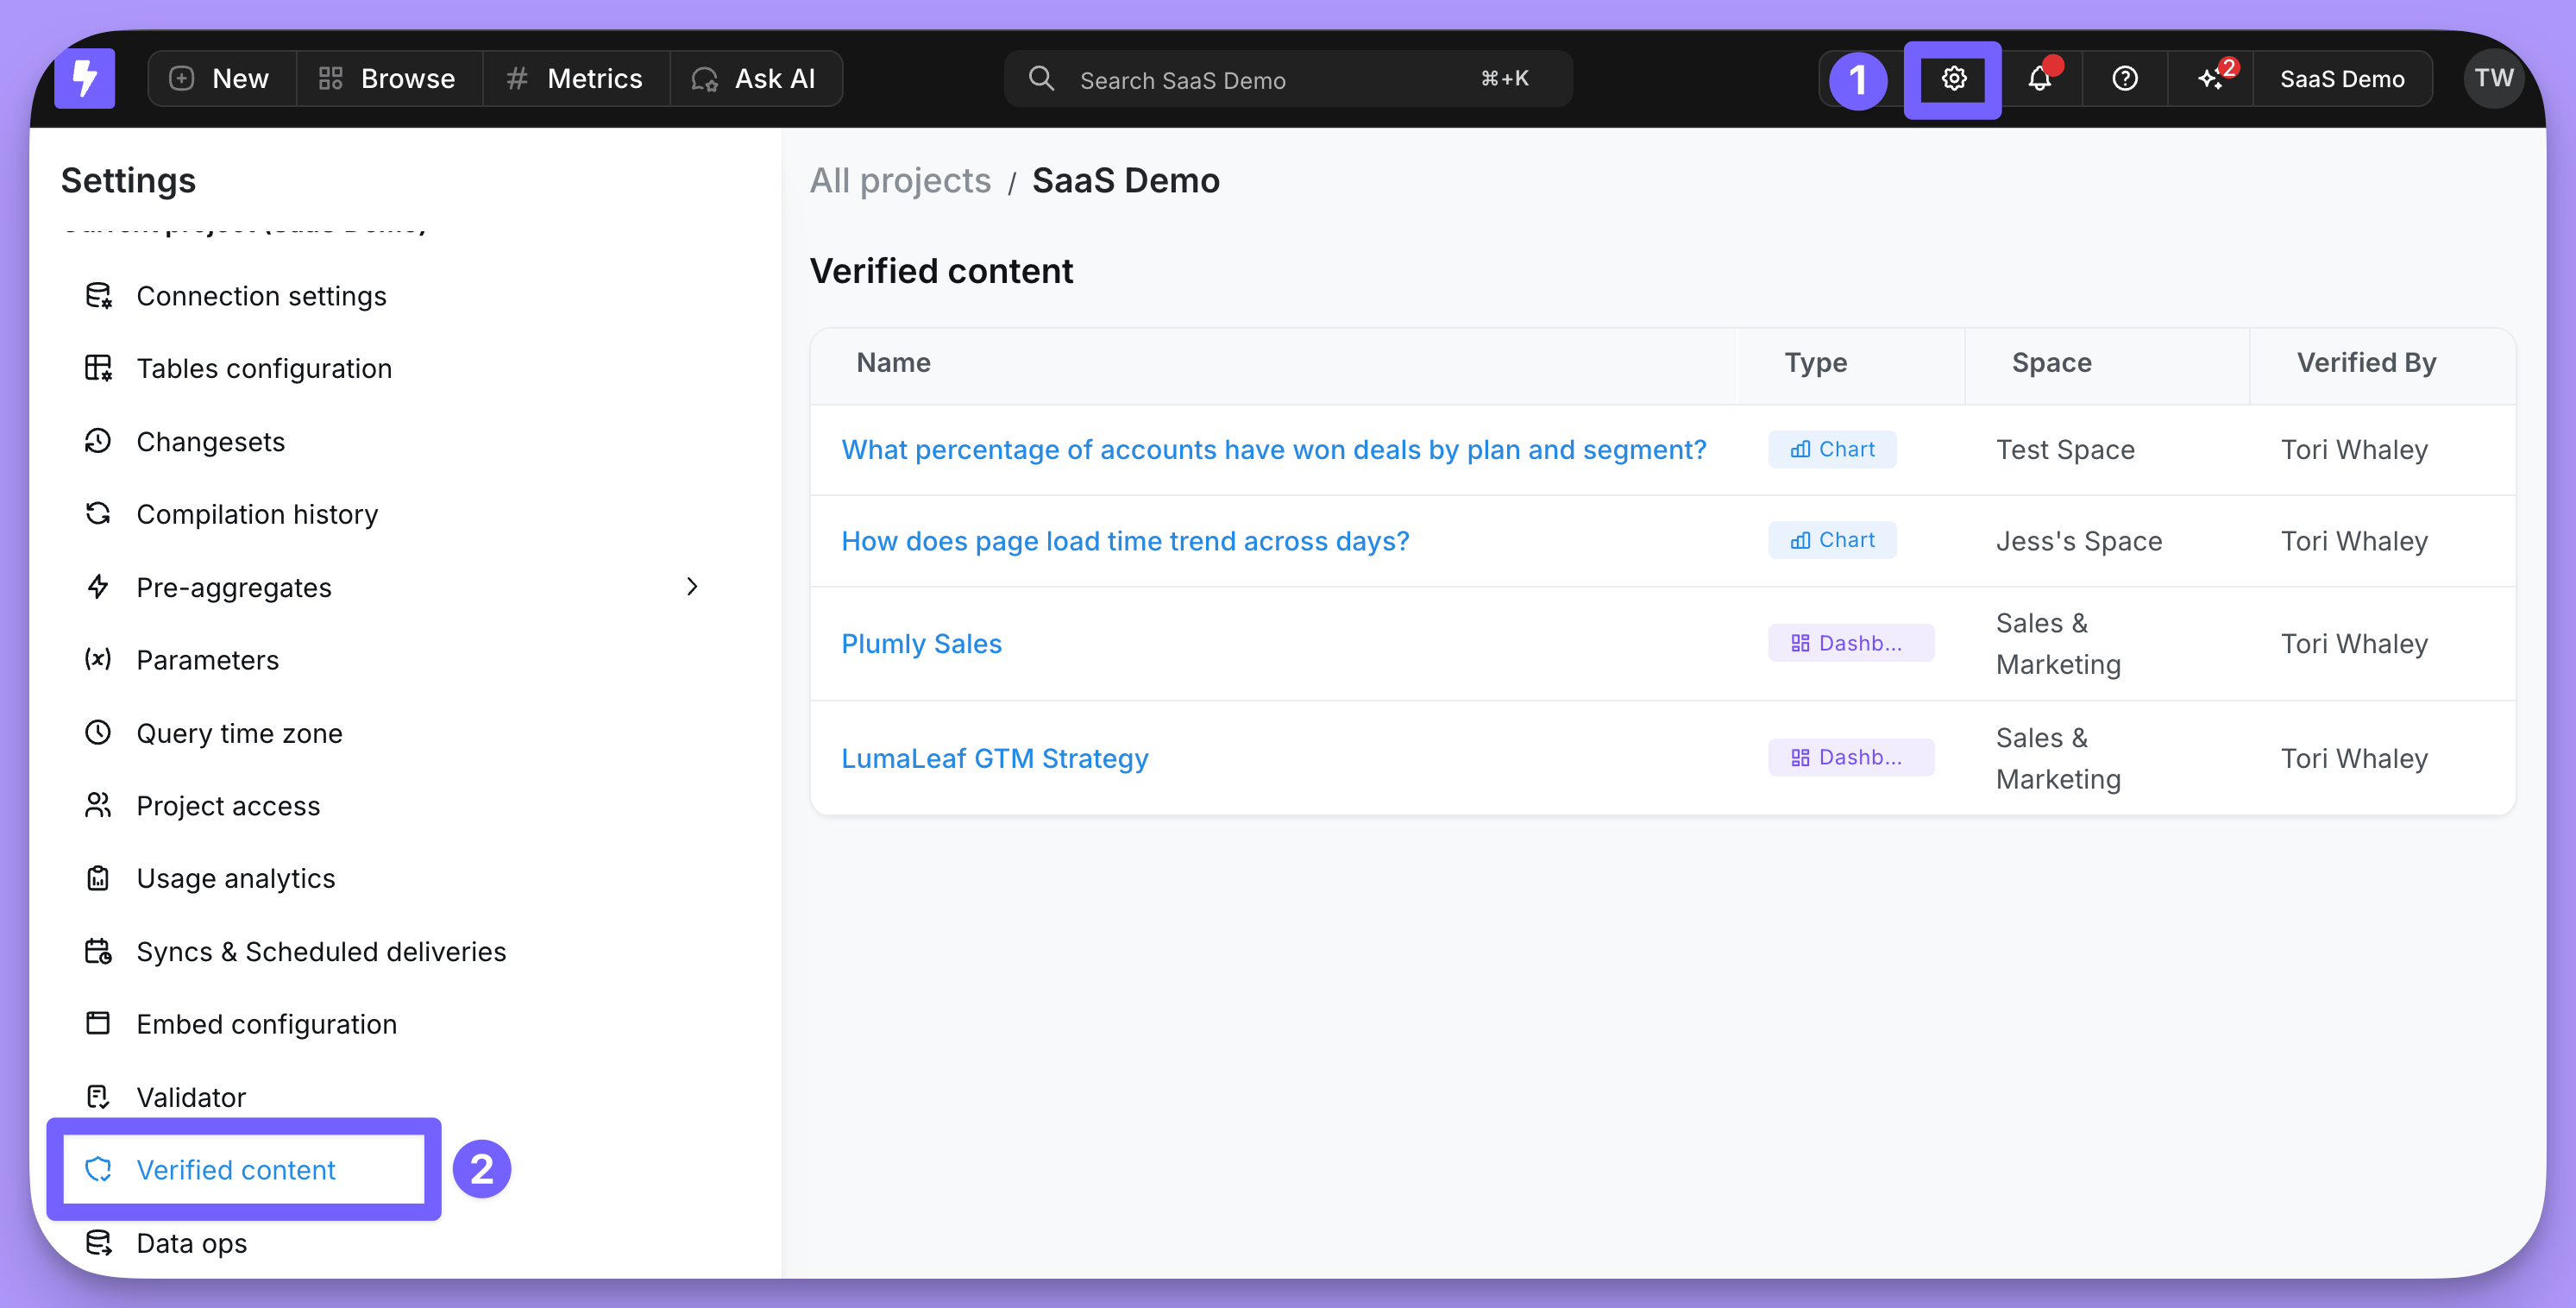
Where users see verified content
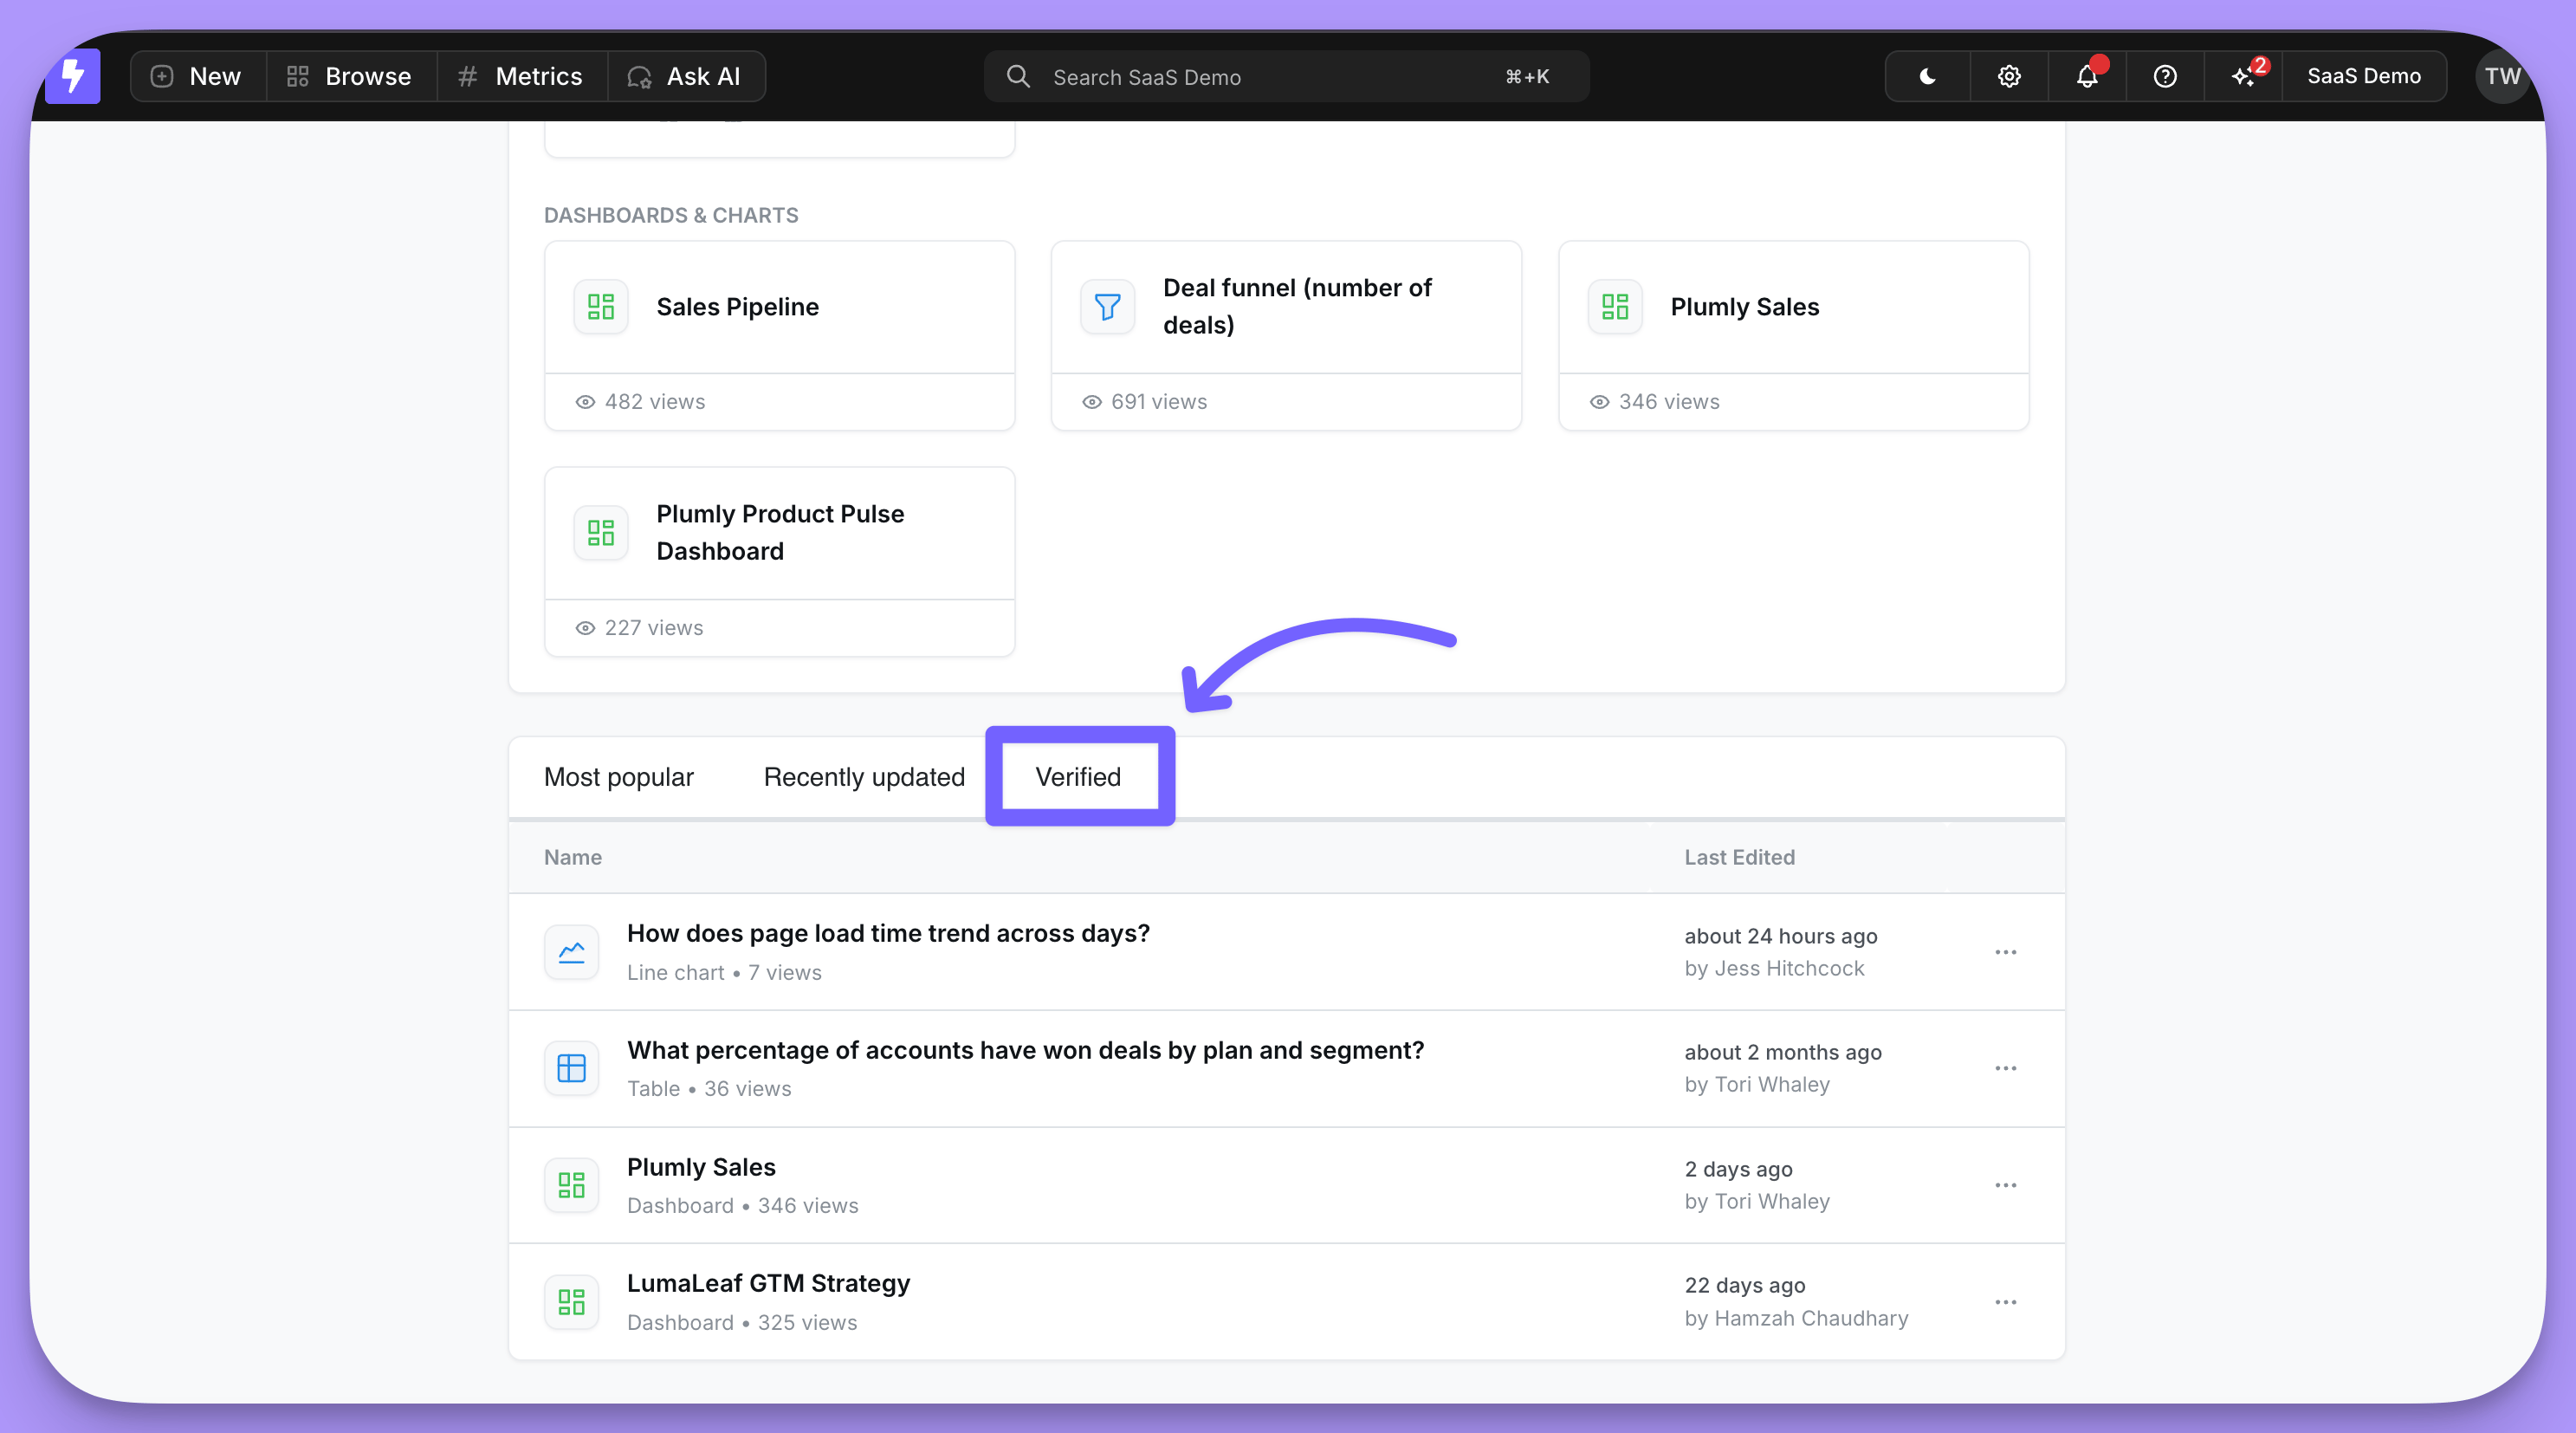
Once a chart or dashboard is verified, the green checkmark badge appears wherever that content is surfaced, including:- The homepage, so users can quickly spot approved content to start from
- Chart and dashboard listings
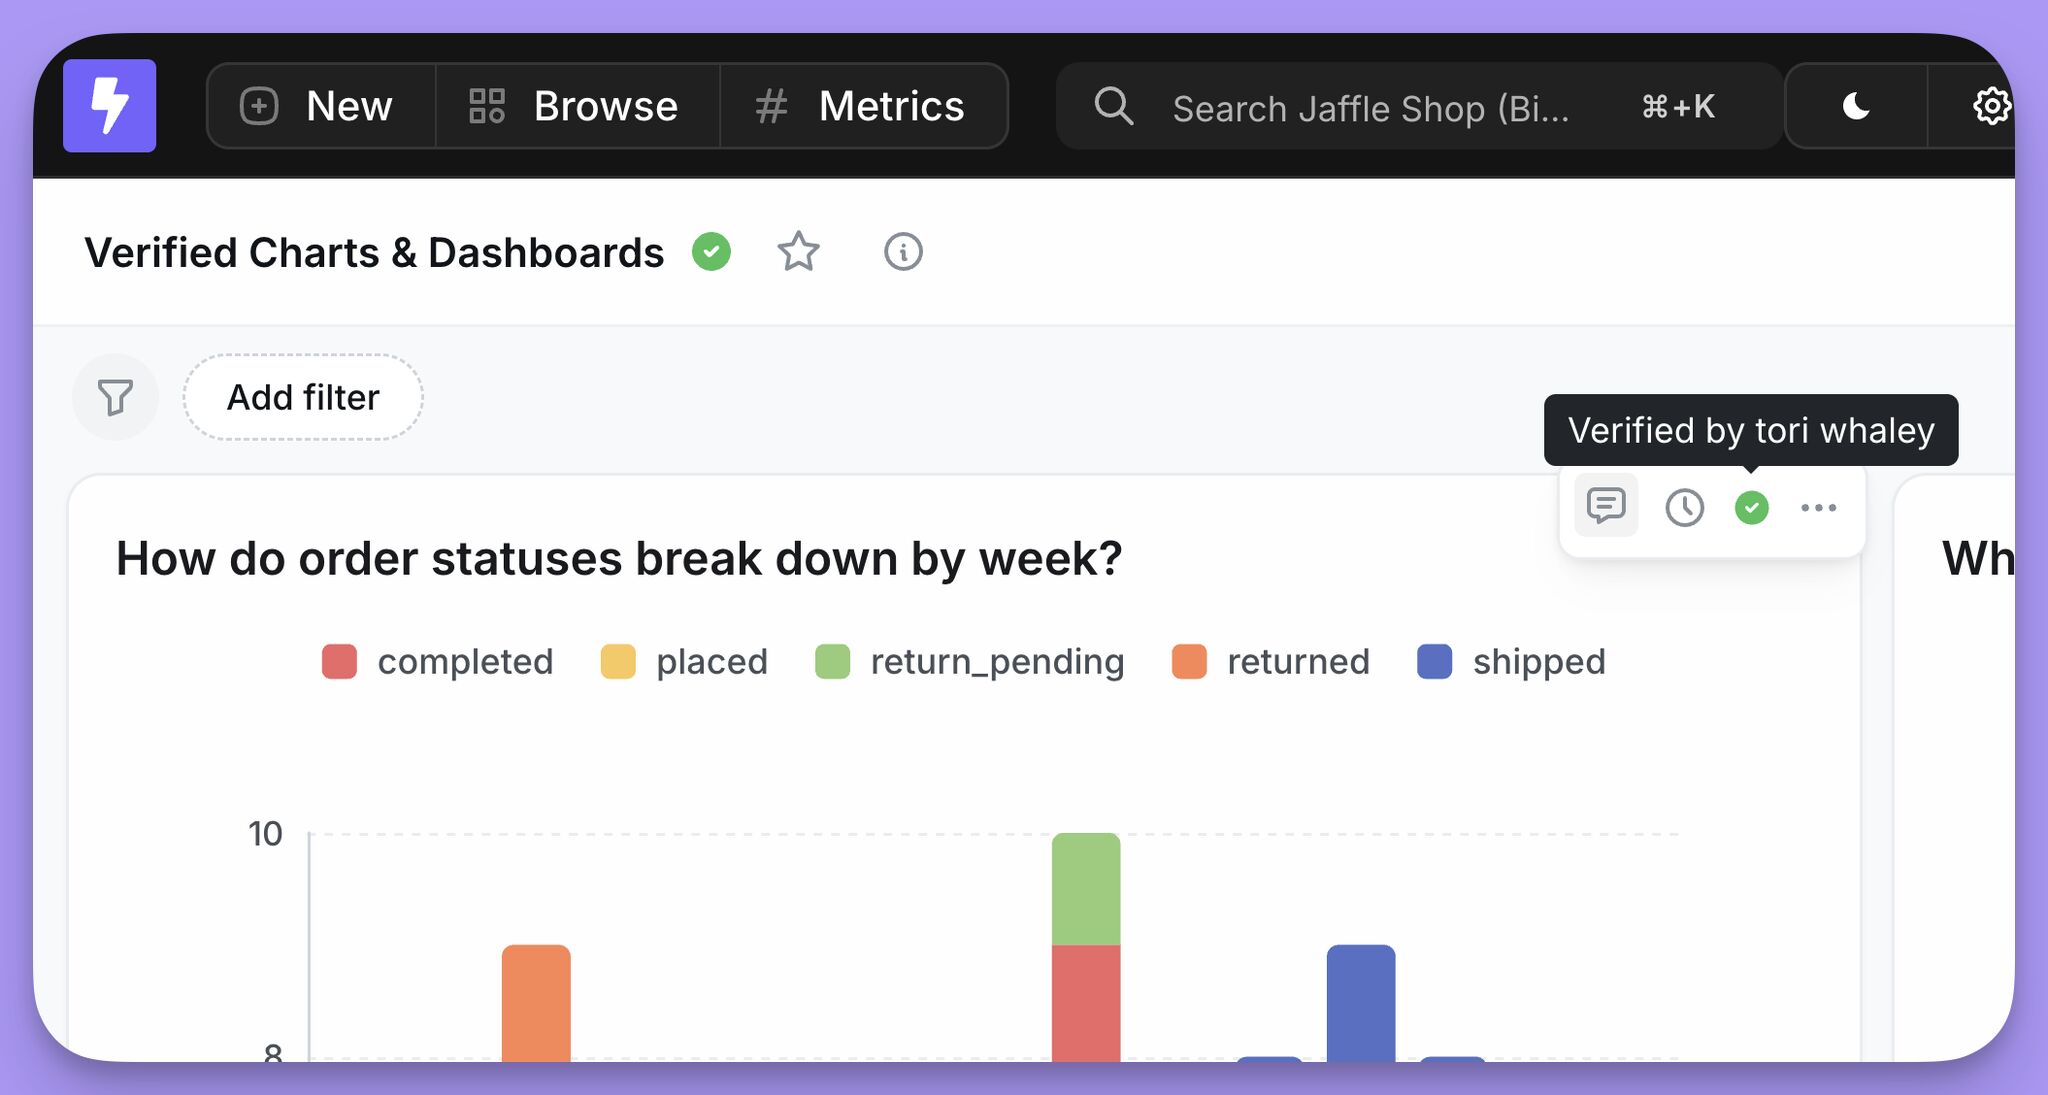
- Inside the chart or dashboard itself, along with the verifier’s name and verification timestamp
AI agents prefer verified content
When an AI agent searches your project for existing charts and dashboards to reference, admin-verified content is ranked first. If a verified chart or dashboard matches the user’s question, the agent surfaces it ahead of unverified results and tells the user it’s verified, including who verified it and when. This applies to:- The agent’s content search, used when a question can be answered by an existing chart or dashboard
- The agent’s dashboard chart previews, where verified charts inside a dashboard are shown first
External agents and MCP
Verified content is also exposed to external agents through the Lightdash MCPlist_verified_content tool. This lets tools like Claude, Cursor, or your own agents discover the charts and dashboards your team trusts and build on them instead of guessing.
The tool returns both admin-verified content and verified answers that have been saved as charts or dashboards, deduplicated into a single list. Each item includes enough signal for an agent to rank and drill into it — description, views, and lastUpdatedAt, plus chartKind and exploreName for charts. As with in-product retrieval, verification is an absolute trump: a verified item is preferred over a more relevant but unverified one, with relevance order preserved within each group.
This works hand in hand with verified answers, where users mark answers an AI agent produced as good examples. When one of those answers is saved as a chart or dashboard, verifying it also makes it verified content — see Verified answers and verified content below.
What happens to verification when content is edited
Verification is tied to the exact state of the content at the time it was verified, so editing a verified chart or dashboard puts its badge at risk. To make sure the badge never disappears silently, Lightdash shows a confirmation dialog whenever you save changes to verified content. What you can do in that dialog depends on whether you’re allowed to preserve verification:- If you can verify content (you have verify permission, or you’re the original verifier), you’re offered the choice to keep the badge as part of saving. Choosing Save & verify re-approves the current version and keeps the badge (updating the verification timestamp to your save); choosing Save drops it.
- If you can’t verify content (for example, an editor saving a chart verified by someone else), saving removes the badge. You’re warned first and can cancel, but you can’t keep it — someone with verify permission then needs to review the updated version and re-verify it.
What you see when saving verified content
The confirmation dialog comes in two variants:- If you can keep the badge (verify permission or original verifier), you get a Keep this verified after saving? prompt with two options: Save drops the badge, and Save & verify keeps it and updates the verification timestamp to your save. Note there’s no automatic retention — even the original verifier keeps the badge only by choosing Save & verify.
- If you cannot keep the badge, you get a warning: “Saving your changes will remove its verified status until someone verifies it again.” You can Cancel to back out, or Save anyway to save and drop the badge.
Verified answers and verified content
Lightdash has two places you can verify something, and they now feed into each other:- Verified content — a saved chart or dashboard that someone with verify permission has approved. It gets the green badge and everything described on this page: listings, search, content-as-code, MCP, and in-product AI retrieval.
- Verified answers — an answer an AI agent produced that a user marks as a good example inside a conversation. It trains that agent (few-shot examples, suggested questions, Slack replies).
list_verified_content MCP tool alongside admin-verified content. Removing verification from the answer removes it from both places too.
A few things worth knowing about how the two interact:
- Only saved answers bridge. An answer that lives only inside an agent conversation stays an agent example — it won’t get a badge or appear in MCP until it’s saved as a chart or dashboard. Save it first, then verify it, to make it verified content.
- The link is one-way. Verifying an AI answer promotes the saved chart or dashboard to verified content. Verifying a chart or dashboard directly does not reach back and mark the originating agent answer.
Still on the way
One piece of the unified experience isn’t here yet: using verified content as templates when the AI agent generates brand-new charts and dashboards. (Once a saved answer is verified, it already flows through content-as-code, search, and MCP like any other verified content.)Verification in charts and dashboards as code
Verification status is included in charts and dashboards as code. When you runlightdash download, verified content includes verification metadata in the YAML, and lightdash upload can apply or remove the verified badge based on what your YAML says.
Two fields: verification and verified
Verified content has two related fields in the YAML:
verification— read-only audit metadata showing who verified the content and when. Emitted on download for visibility in version control. Ignored on upload.verified— a boolean that controls verification state on upload. This is the field you edit to change verification.
lightdash download:
How verified behaves on upload
The verified field has three states:
| Value | Behavior on upload |
|---|---|
verified: true | Verifies the content. No-op if already verified. |
verified: false | Unverifies the content. No-op if already unverified. |
verified absent | Leaves verification state unchanged. |
verified line.
Permissions
Only users with permission to verify content (admins, developers, and any custom role grantedmanage:ContentVerification) can change verification state via the CLI. If you upload a YAML containing verified: true or verified: false but you don’t have verify permissions, the upload still succeeds — the rest of your changes go through, but the verification field is silently skipped and a warning is logged on the server.
This means CI pipelines run by deployers without verify permission (for example, a custom role that has manage:ContentAsCode but not manage:ContentVerification) won’t fail just because a YAML file contains a verified field they can’t act on.